
It is precisely the Image Hover Effects plugin that adds scrolling effects to the image within the site .
It is also easy to use and offers a variety of scrolling effects on the item to choose from them . These can also help you add important information to the photos such as location, price, availability, etc .
This gives you more freedom in customization options regarding your photos and the look of your own site .
What effects can be applied to photos in the Elementor editor ?
The image scrolling effect is an interactive element that allows displaying additional information about an image in a stylish and effective way . There are also a variety of scrolling effects to choose from, and they don’t slow down the website or clutter up your design .
In most cases, the animation causes slowness on the site, but with this CSS feature there are no problems .
Therefore, they are ideal for all needs and there are a variety of other uses for each of them .
For example, if you have a photography website, you can add a scrolling effect to show where the photo was taken, the date, or something else .
There is also a wonderful and Golden use to add details and information about products or any other items . Thus, you can add an image of a product and use these effects to display it when the order is available, add the price of this product or any other of its details . There is no limit to creativity in this matter .
How to add scroll element effects ?
First : how to install the Add / Image Hover Effects /
The effects of scrolling photos in the extension ( Elementor Addon) are really amazing in what it offers . As the name suggests, it is an extension extension for Elementor and the most important addition, if not the best site builder in WordPress . Therefore, both must be installed at the same time .
This add-on offers about 40 different scrolling effects, including fade-in, zoom-in, Blur and other scrolling effects . You can also add a title, description, Set a title tag, add icons or links to other pages .
In the new user interface you can take advantage of it if you want to see the effects in areas such as the footer or sidebar and directly .
To install this add-on, click on the Add-ons option and choose the add new option as shown in the figure .

We search for the extension (Image Hover Effects) in the available search option and select the extension that we may find useful .

We flip through the options to find the extension (Image Hover Effects-element Addon) and click on Install and then activate this extension and it becomes ready for use .

If you do not have the Elementor builder installed in the first place, we will have a message at the top of each page telling us to install it immediately .

Second : add the widget
Adding scrolling effects is easy but to make it clear you can’t simply add a scrolling effect to a previously existing photo . Instead, we will need to re-insert the image again using the appropriate item inside the mentor editor .
As a result, we may have to do searches in the media library to find any images, but it shouldn’t be that bad, so if we want to add this feature, it will take more time .
Go to any post or page on the site and click the Edit button using the mentor .

And here the mentor editor will open on the left side, search for that extension and drag the tool to the page or publication as in the following figure .

Now you are ready to start customization in this tool and all the settings can be found on the left side as well .
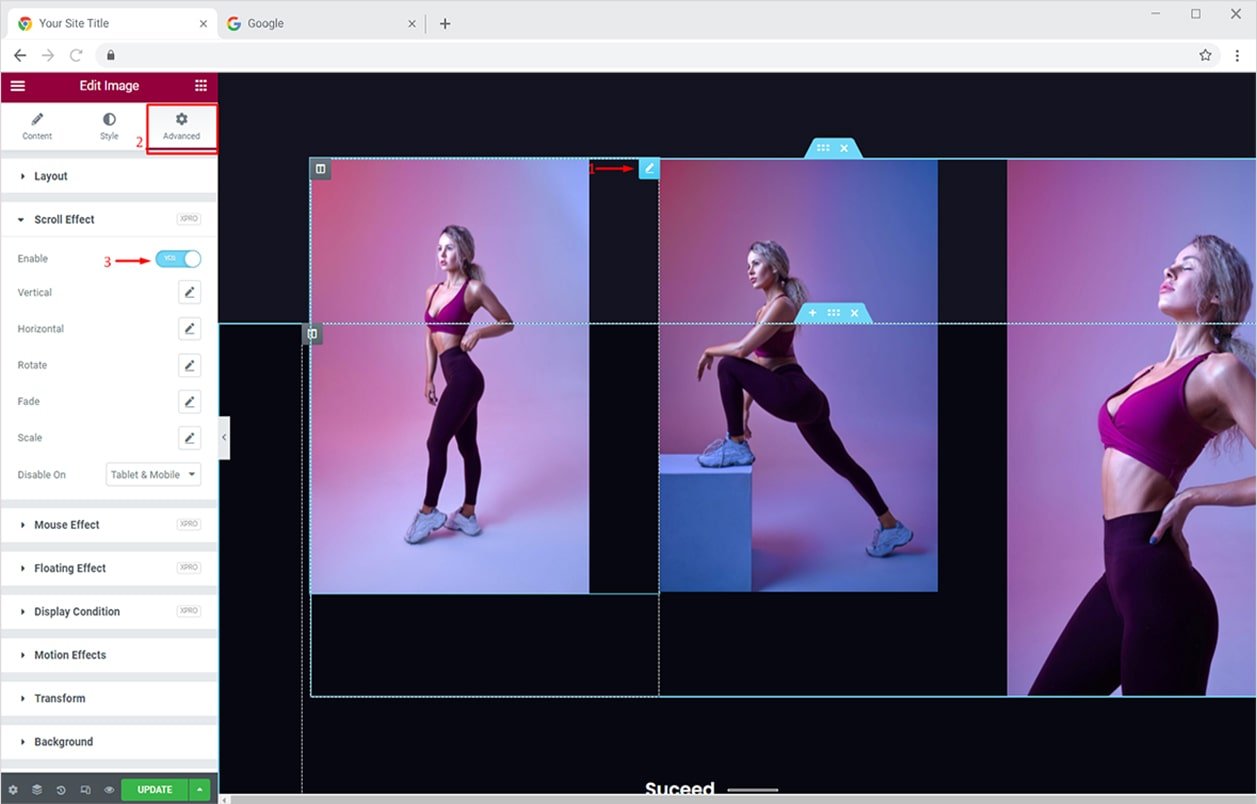
Third: impact settings
The review process of the settings should take only one or two minutes and no more and is easy enough to be understood by anyone
The first option: is the effects
As mentioned earlier, there are about 40 add-ons to choose from and they appear in a drop-down dialog box from which we select what we want .
Note : we can follow what the effect does by selecting and scrolling over this tool that we added to the article or page

The next option: is to add the actual image
We add an image from the media library and options such as setting the image size, title and much more appear below it .

Like adding a title and a title tag, the title is what will appear in the header text, while the title tag is the font shape that will appear as (H2, H3, H4, etc.).

Then after that the description of the picture can be found . It is in this place that a lot of additional information about the image can be added .

In addition, here we can add an icon to the special address and it will appear either before it (to the left of the address) or after it (to the right of it) .
Note :
in case you don’t see this icon when you hover over the image, it’s because of the recent update of the illustrator . To fix this problem, click on the Advanced settings option for the security editor and enable support
( Load Font Awesome 4 ) .

And in the end, this option can be linked to the adjacent figure and in this way you can turn your image into a link to another page or website .
This is great for the sales page or affiliate link of the site .
It can also be left blank when we don’t want to add a link to another site

And so we have made all the settings, we save or update and we can view the site .

After all these steps, this Add-On has become free to work with all its settings
Not every photo needs scrolling effects
Like most effects, you can have a lot of options that help with scrolling effects in many areas of the site . but it should be noted here that they may be annoying for some visitors sometimes .
As an example, it is common for the user to leave the mouse in the middle of the page when scrolling down .
Unintentionally, the mouse is moved over the effects as they move down the page , while it is easy to move the mouse, it can be a bit annoying .
The same applies to converting images into links as well when the visitor thinks that clicking on this image may enlarge or reduce it , and therefore you are taken to another site .
Consistency with the use of the effect
In addition , it may be confusing for visitors who do not know which images will contain additional information or not, and in fact, some may not know that you have scrolling effects in your site either .
To fix this, you can add some kind of indicator before or below the image to notify the visitor about this to make the most of the feature on your site .